How to fix Skype can’t connect – Ubuntu 16.04

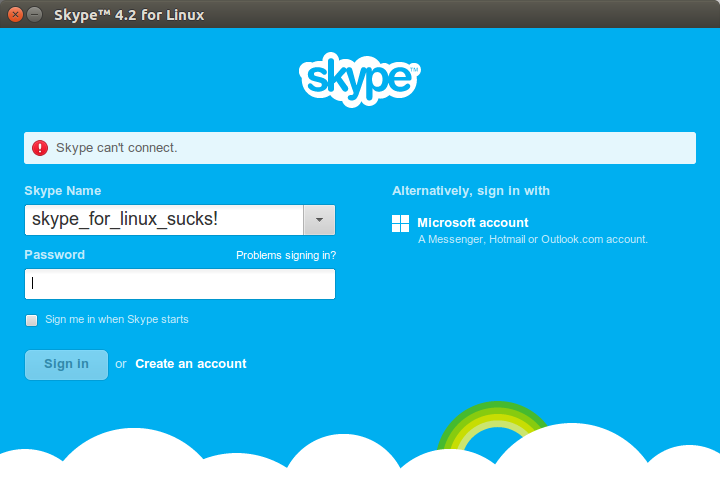
I just updated to Ubuntu 16.04 and tried to make a Skype call.  It said that “Skype can’t connect”.  The error message looks like this:

Skype Can't Conect Ubuntu

To fix this you need to remove Skype completely from your system including your settings.

1) Remove the skype and it’s settings

sudo apt-get remove –purge skype skype:i386

2) Remove any settings in your home directory:

rm -rf ~/.Skype

3) Reinstall the application:

sudo apt-get install skype

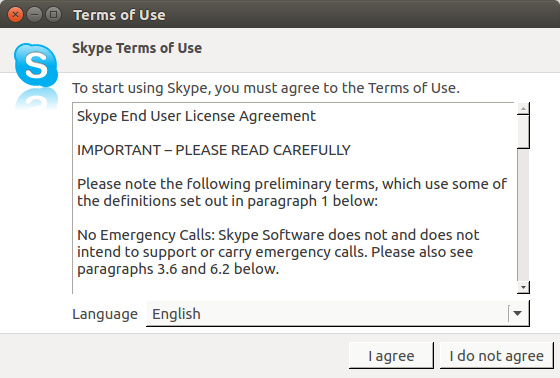
You should then launch Skype and see the following term dialogue box.

Terms of Use_026

If you don’t see this box when you first launch Skype then you didn’t remove all the settings.  Your Skype should now connect 🙂

How To Install PHP 5.6 on Ubuntu 16.04

I just upgraded one of my Ubuntu Servers to Ubuntu 16.04.  The media wiki installation shopped working because it now comes with PHP 7.  I tried upgrading mediawiki to the latest version but this didn’t seem to work either.   I can’t seem to find out if Mediawiki support PHP 7.  So, I thought I would install PHP 5.6 in parallel on Ubuntu 16.04 by using a PPA (which I generally don’t like)

Here are the commands that I used:

add-apt-repository ppa:ondrej/php
apt update
apt install php5.6 libapache2-mod-php5.6 php5.6-curl php5.6-gd php5.6-mbstring php5.6-mcrypt php5.6-mysql
a2dismod php7.0
a2enmod php5.6
systemctl restart apache2

Hope this helps someone.


Apache config error Invalid command ‘php_flag’ Ubuntu 16.04

I have just started to upgrade some servers to Ubuntu 16.04.  It looked good until I rebooted to the server and the Apache2 service didn’t start up properly.  I view the logs in systemd.  Using the command:

systemctl status apache2.service

● apache2.service – LSB: Apache2 web server
Loaded: loaded (/etc/init.d/apache2; bad; vendor preset: enabled)
Drop-In: /lib/systemd/system/apache2.service.d
└─apache2-systemd.conf
Active: failed (Result: exit-code) since Tue 2016-04-26 13:29:37 EDT; 7min ago
Docs: man:systemd-sysv-generator(8)
Process: 1343 ExecStart=/etc/init.d/apache2 start (code=exited, status=1/FAILURE)

Apr 26 13:29:37 hostname apache2[1343]:  * The apache2 configtest failed.
Apr 26 13:29:37 hostname apache2[1343]: Output of config test was:
Apr 26 13:29:37 hostname apache2[1343]: AH00526: Syntax error on line 59 of /etc/apache2/apache2.conf:
Apr 26 13:29:37 hostname apache2[1343]: Invalid command ‘php_flag’, perhaps misspelled or defined by a module not included in the server configuration
Apr 26 13:29:37 hostname apache2[1343]: Action ‘configtest’ failed.
Apr 26 13:29:37 hostname apache2[1343]: The Apache error log may have more information.
Apr 26 13:29:37 hostname systemd[1]: apache2.service: Control process exited, code=exited status=1
Apr 26 13:29:37 hostname systemd[1]: Failed to start LSB: Apache2 web server.
Apr 26 13:29:37 hostname systemd[1]: apache2.service: Unit entered failed state.
Apr 26 13:29:37 hostname systemd[1]: apache2.service: Failed with result ‘exit-code’.

I did a Apache2ctl config test like so:

AH00526: Syntax error on line 59 of /etc/apache2/apache2.conf:
Invalid command ‘php_flag’, perhaps misspelled or defined by a module not included in the server configuration
Action ‘configtest’ failed.
The Apache error log may have more information.

The problem is the setting “php_flag engine off” and “php_admin_value engine Off” settings.  Which looks like so.  This setting stops php files being executed in certain folders (such a image folder etc).

<DirectoryMatch ^.*/somewhere/>
AllowOverride None
  php_flag engine off
php_admin_value engine Off
</DirectoryMatch>

I removed both of these and restarted apache again using:

sudo systemctl start apache2.service

Hope this helps someone else.
How to move the Unity menu to the bottom – Ubuntu 16.04

There are two ways of move the Unity menu from the side to the bottom.   You can either move the launcher to the bottom using a single command line statement or dconf.  The best way is just to cut and paste this command into a terminal

gsettings set com.canonical.Unity.Launcher launcher-position Bottom

This setting will stay and the Unity menu with stay at the bottom even after a reboot.  You can also move the menu back to the left hand side like so:

gsettings set com.canonical.Unity.Launcher launcher-position Left

Voila.  You are good to go 🙂


How To Set The Default Paper Size To A4 in Firefox

I am running Firefox on Ubuntu and the default paper size was US Letter.  I wanted to set the default paper size to A4.  There isn’t a graphically interface to do this.  So you have to:

  1. Visit about:config
  2. Search letter
  3. You should have a result with a value of na_letter.
  4. Double click to modify and change the value to A4

Then it should look like this:

Selection_007


Hopefully that helps someone change the default paper size from US Letter to A4.

How To Connect Phone To Mazda Mx3 via bluetooth

My friend has a reasonably new Mazda MX3.  Unfortunately she could not get her phone to connect to the Mazda’s bluetooth.  The main problem was that the Mazda bluetooth never appeared as a device on her iPhone.   She asked me to help and we followed the instructions in the manual.  The instructions for connecting a phone via bluetooth are:

  • Get your phone out and enable bluetooth
  • Navigate through the menu on the car
  • Select ‘BT Setup’ – annoying the last item in the menu
  • Select ‘Pair Device’
  • You are then offered a pin (by default 0000).
  • You should then see the car appear as a device on your phone (by default Mazda).
  • You then theoretically click on Mazda and then enter the pin.
  • You should then be connected…

The problem for us was that the Mazda never appeared as a device.   This means you can’t select it on the phone and the car just shows an ‘Err’ message during the BT setup process.   If you Google around for solutions, they all say you need to reset you whole car by disconnecting the battery or go to a dealer.  Well, who wants to do that!

The Solution

The solution we found was to setup the phone through the voice command system.   So, this is how to connect your phone to a Mazda via bluetooth.

  • Hold down the phone button on the steering wheel.
  • The car should go into ‘Listening’ mode and you then need to speak to it.
  • Say ‘Pairing options’
  • Then follow the instructions all the way through to the end which finishes with giving a name for your phone (you can make this up).  Please note – don’t give up too early (even if you think you have completed) because unless you name you phone it won’t be able to connect.

Voila – you should finally have connected your iPhone to your Mazda bluetooth.  I hope this helps someone.

A Detailed Comparison of Clearview Vision 500 / Pioneer 400 vs Contura 51L woodburning stoves

I’m a massive fan of Clearview Stoves.  They are build like tanks, are easy to use, controllable and crucially the glass at the front always stays clear.   My parents have had a Clearview stove for a long as I can remember and I had one put into our last house.  We used it for 4 years and loved it.

cleaview-vision-vs-contura-51lThe Clearview Vision 500 vs Contura 51l

We recently moved house and it didn’t have a wood burning stove.  I wanted to put one in.  The natural option would have been to put in a Clearview Pioneer 400 or a Vision 500 but our new house is quite modern and the Clearview’s has very traditional appearances.  If you talk to a woodburning stove sales person, they always say  ‘every stove now has the same system as the Clearview and the glass always stays clean…’.   I know this isn’t true because I have a number of friends and relatives with a variety of brands which don’t burn cleanly.  So, I did lots of research and I found the Contura 51L (Note: This stove used to be known as a Handol 51l).  It has got hardly any reviews online but most say it’s excellent and after much deliberation we decided to go with this stove.

Now after using the Contura 51l for a little while, I thought I would write a direct and detailed comparisons of Contura and Clearview  to help someone else make the decision.  I will keep updating this post with additional comments as I use the Contura stove.

Glass Cleanliness – Both the Contura 51l and Clearview stoves have similar levels of glass cleanness.   The Clearview used to ‘mist’ up slightly around the corners when shutdown really low (for example when wanting to keep the stove running overnight).   This misting would clear as soon as the stove was fired up again. The Contura doesn’t seem to do this.  The Contura glass does get slightly dustier than the Clearview and so I tend to wipe the glass every 2 weeks (burning each night).

Ease of lighting – Both stoves are easy to light.  I found the fastest way of lighting both stoves is to load them up with paper and kindling.  Then put a log on the top and light the paper.  I tend to leave the door open a tiny bit so that the air is drawn into the stove really fast which quickly grows the flames.  Once the log is burning nicely then I would close the front door properly.  The Contura door lock is actually designed to do this while the Clearview isn’t.

Build quality – The Clearview and Contura have similar build quality.  The Contura is mostly cast iron.  The Clearview is made of heavy steel with a cast door.  The Contura has a slightly smoother finish than the Clearview and feels less agricultural.  The details on the Contura are more refined.  For example – the air flow control slider at the bottom of the Contura run smoothly while the Clearview air venting handle grates a little as you pull it back and forth.  Contura are a very large company mostly making sheet steel stoves for the continental European market.  You can see a video on their factory here.

Handle and Door – The Clearview has a handle on front left hand side.  The Contura handle is on the right side.   The Clearview handle is not removable.  The Contura is optionally removable.  Both get hot.  I have kept my Contura’s handle fixed because I don’t want to loose it or scratch it.

how-to-make-the-contura-51l-handle-removeable

The Contura stove handle is fitted on delivery. To make the handle removable, replace the screw for the lock hook with the shorter screw supplied

There are two main differences between the two doors:

  1. Contura door is sprung loaded which means it tries to close all the time while it is open which means it’s a two handed operation loading and generally messing with the fire.  The Clearview door isn’t sprung loaded and can be left open which is much more convenient.
  2. The Clearview handle locking mechanism is a little more agricultural than the Contura.  The Clearview handle is on a screw and you can vary the door tightness but unwinding the handle. It’s quite easy to accidentally over or under tighten the door. On the odd occasion, when the Clearview is really hot, I could barely open the door and had to use a log to bang the handle open.  The Contura door handles isn’t adjustable and works slightly more smoothly.

Installation – The Contura 51l is rated at between 3-7kw with a nominal output of 5Kw.   This means that you can install the Contura 51l without an air vent but you can run the stove up to 7kw.  This is a bit of number fiddling on Contura’s part.  Our house isn’t very well sealed and so I wasn’t worried about not having a vent.  If you choose the Clearview Pioneer 400 then it doesn’t need an air vent but can only reach 5kw.  If you choose a Clearview Vision 500 then you need an air vent but can’t achieve 8kw.

Multi fuel – Clearview stoves are multifuel while the Contura 51l isn’t.   This wasn’t a problem for us because we only like to burn wood.    If you really want to burn coal then you would need a Clearview.  However, you should be aware that the sulfur in coal can damage our your chimney lining.

Log Size – The Clearview Vision 500 has the best of log length at 380mm.  This is closely followed by the Contura 51l with a maximum log length of 350mm.

  1. Clearview Vision 500 Max Log Size – 38cm (15”) approx
  2. Contura 51l Max Log Size –  35cm (14″) approx
  3. Clearview Pioneer 400 – 25cm (10”) approx.

Viewing – The Contura 51l has the largest viewing windows and is about 20% larger than the Clearview Vision 500 and 50% larger than the Clearview Pioneer 400.  Here the rough measurements.

  1. Contura 51l window size – 29 cm (12″) wide by 33cm (13″) high
  2. Clearview Vision 500 – 34 cm (13 1/2″) wide by  24 cm (10)” high
  3. Pioneer 400 Window Size – 26 cm (10 1/4″) wide by 24 cm (9 1/2″) high

Responsiveness – The Clearview is very slightly more responsive to air flow adjustment than that Contura.

Cleaning out the ash – I found the Clearview stove easier to keep clean.  The Contura seems slightly harder to clean out because ash can build up on the front ledge of the stove is easier.

Price – Most stoves are at the more expensive end of the market.  The Contura 51l is roughly £200 cheaper (15%) than the Clearview.

Summary

The Contura 51L is an excellent alternative to a Clearview stove and having used a Contura – won’t be going back to Clearview.  If you are a Clearview convert but need something more modern then the Contura 51l is the stove for you.  It would seem sensible for Clearview to produce a more modern range using their stove technology to avoid losing sales to their competition.

I hope their helps someone. Please leave a comment if you want more detailed info or have feedback.