Great Image Viewer for Mac OS X … Lyn image browser

Apple Mac OS X is a brilliant OS but unfortunately it’s missing a good image viewer. In comparison, Windows has Preview and Ubuntu has the Gnome Image Viewer both of which are great. I did some research and the image browser i found was Lyn Image Browser. I like it so much… I thought I would put write a little review for it.

So why is it so good?

1 – Great Thumbnail Viewer
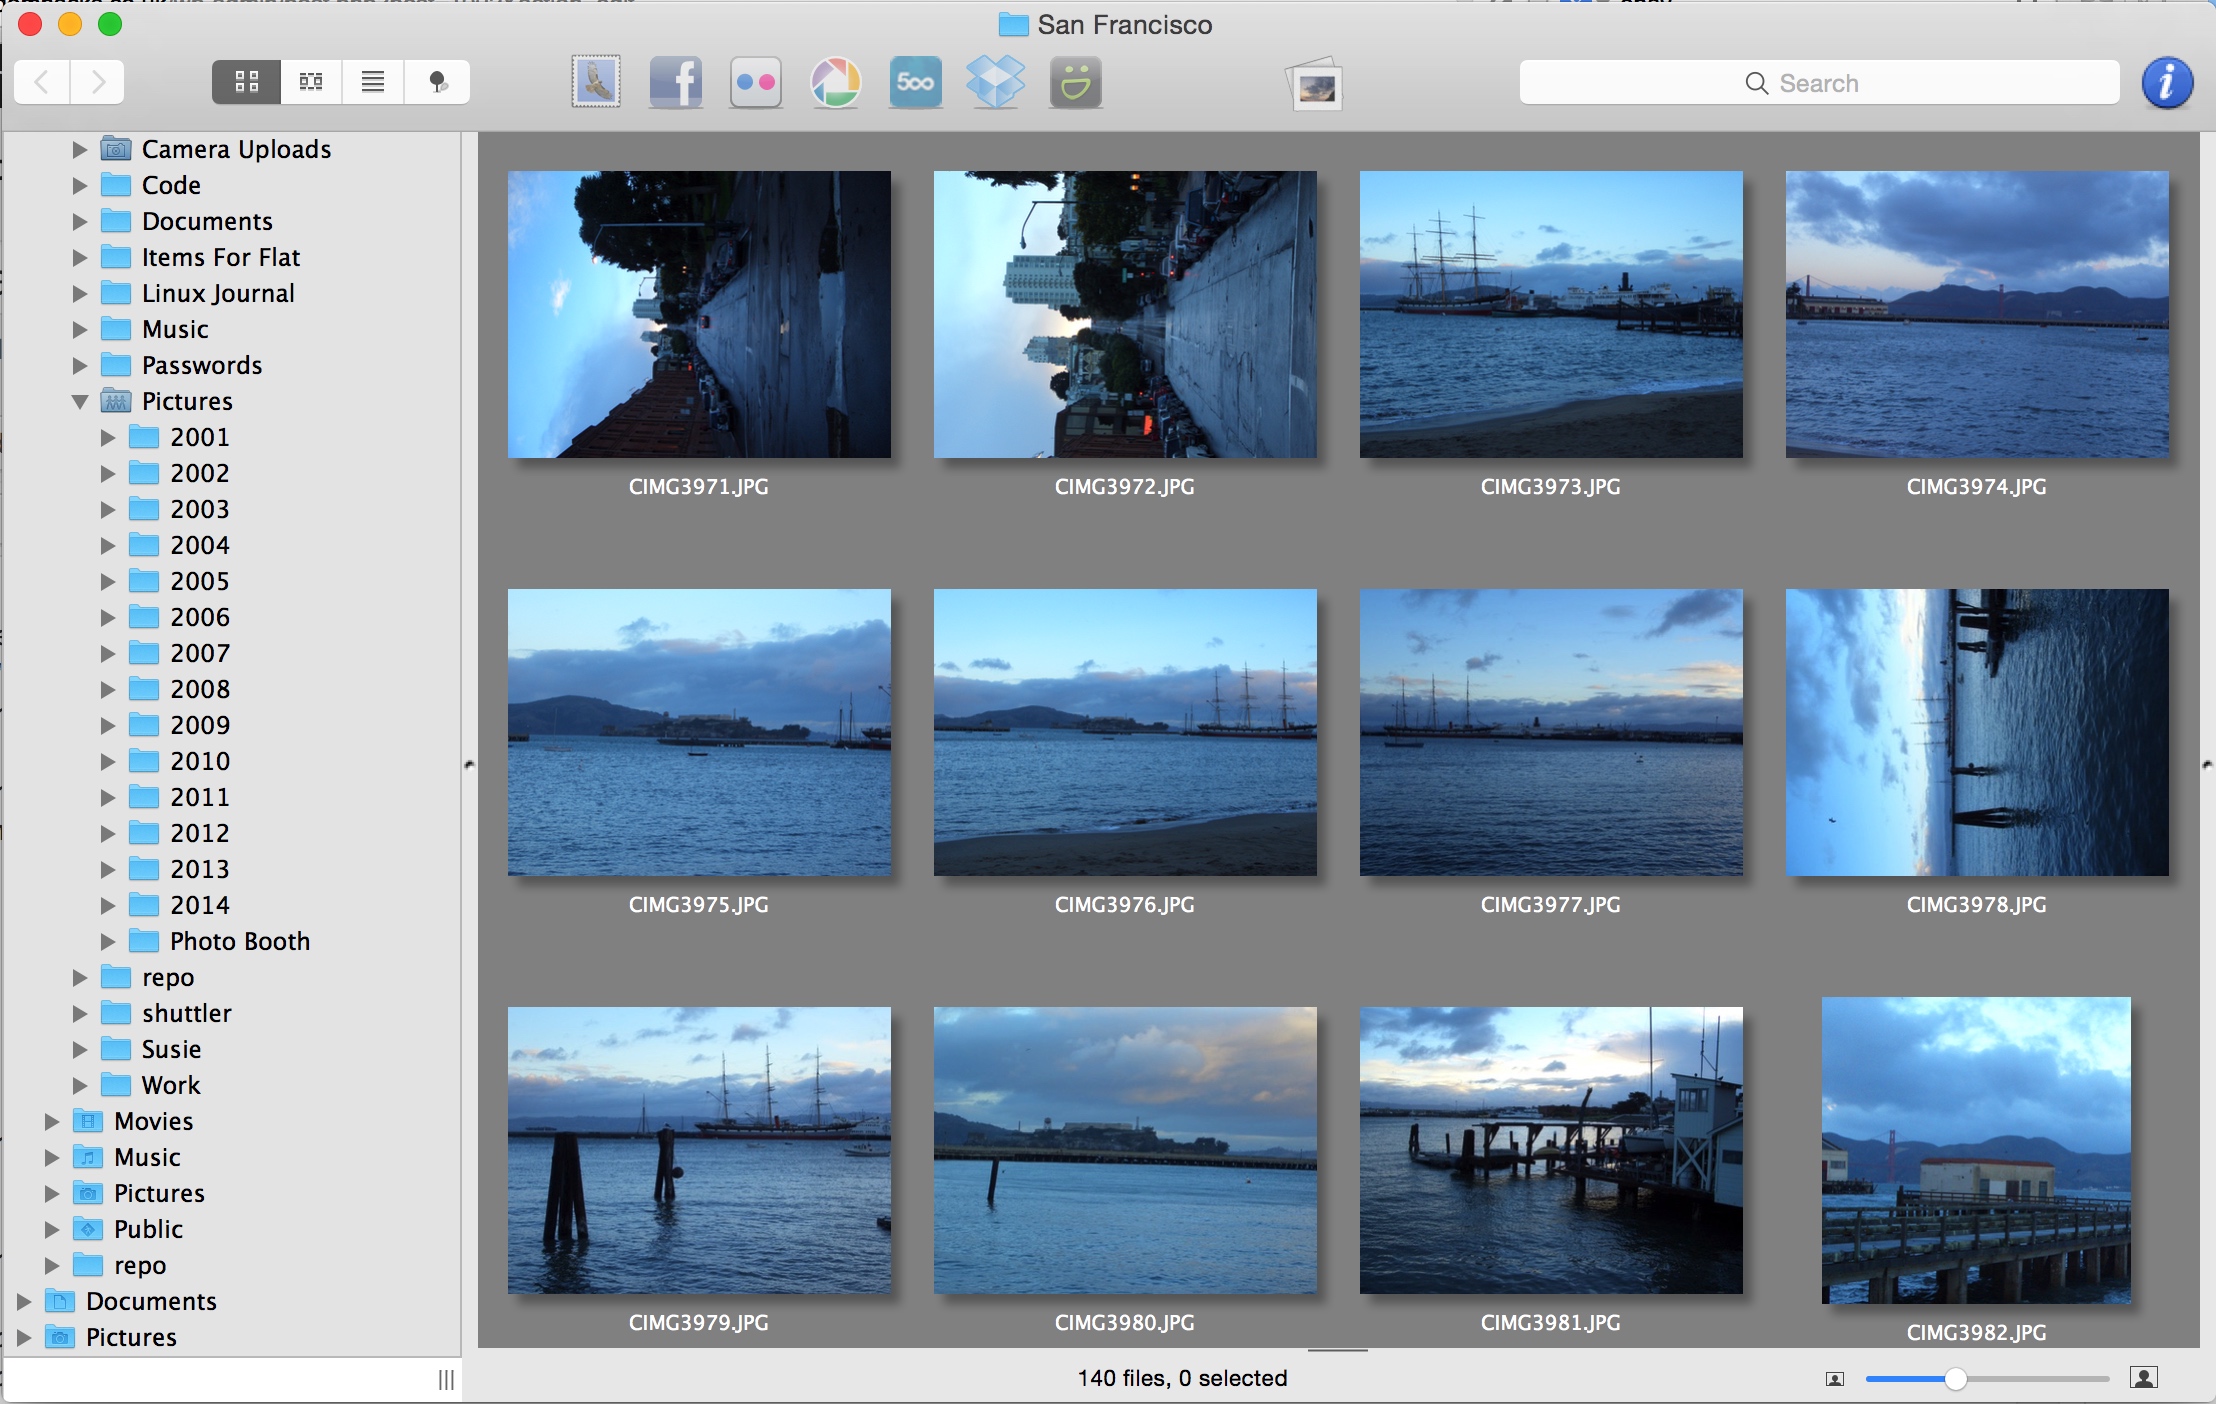
Lyn Image Browser has a great thumbnail viewer where the images are large enough to actually see them. You can browse through folders really quickly and easily.

lyn_image_browser_thumbnail_view_2

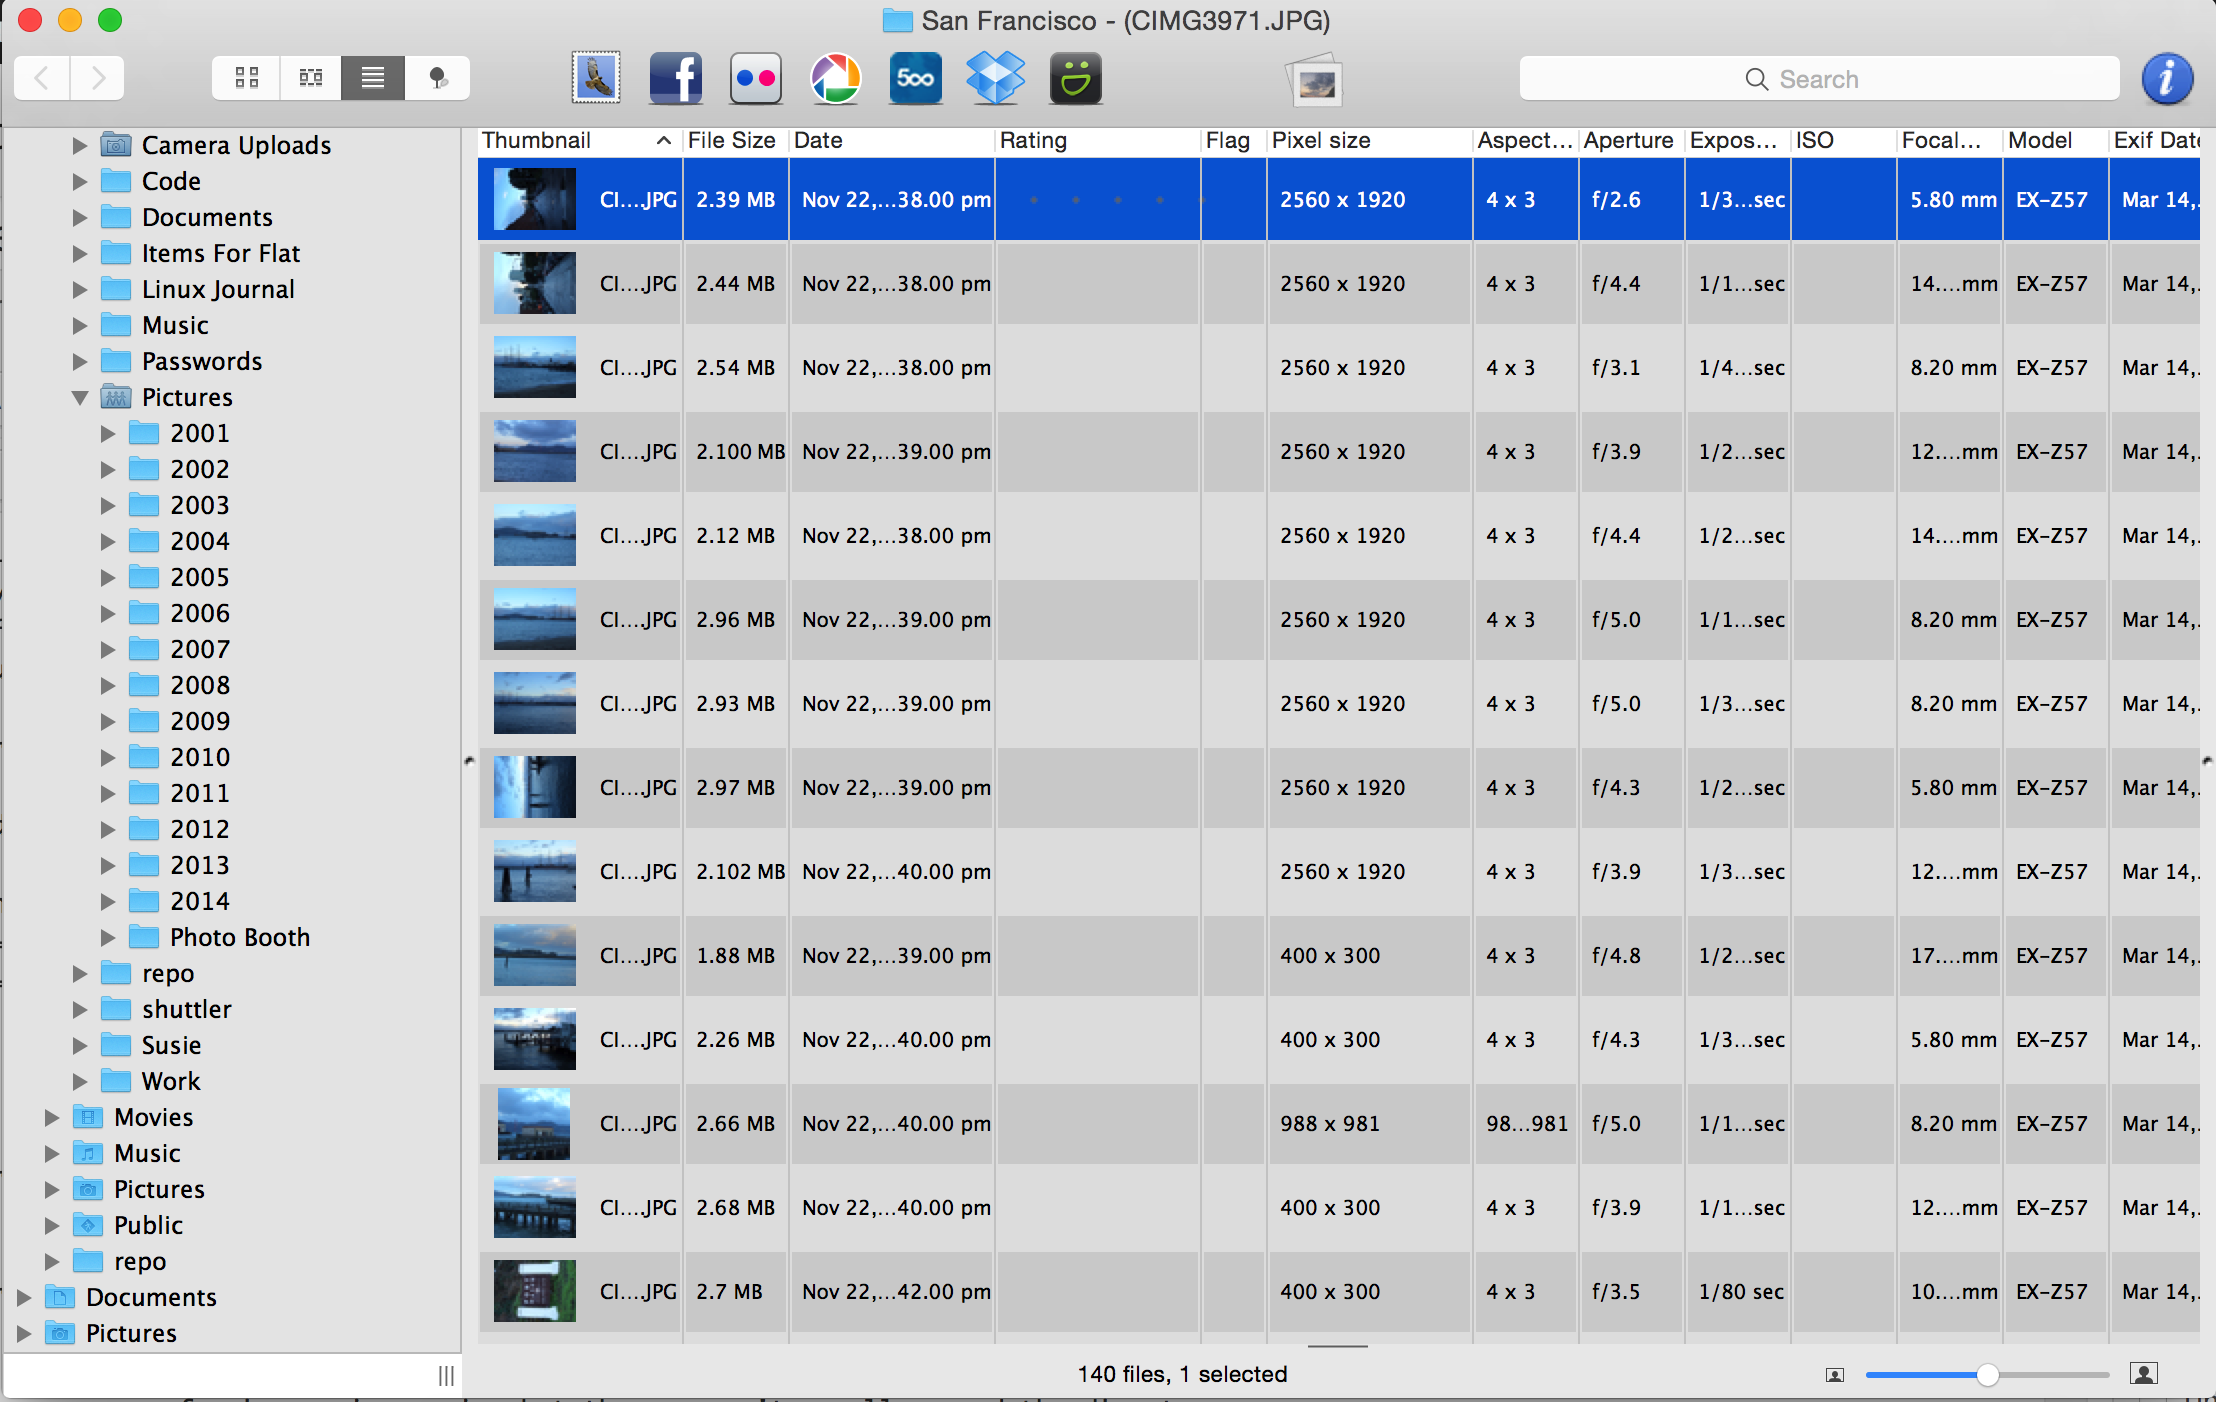
You can also view all the image information:

lyn_image_browser_image_imformation

2 – You can flick between images
This might not sounds like much of feature but frankly it is. Apple’s Preview is missing this key feature and is super annoying while both Windows preview and Gnome image viewer both have this feature.

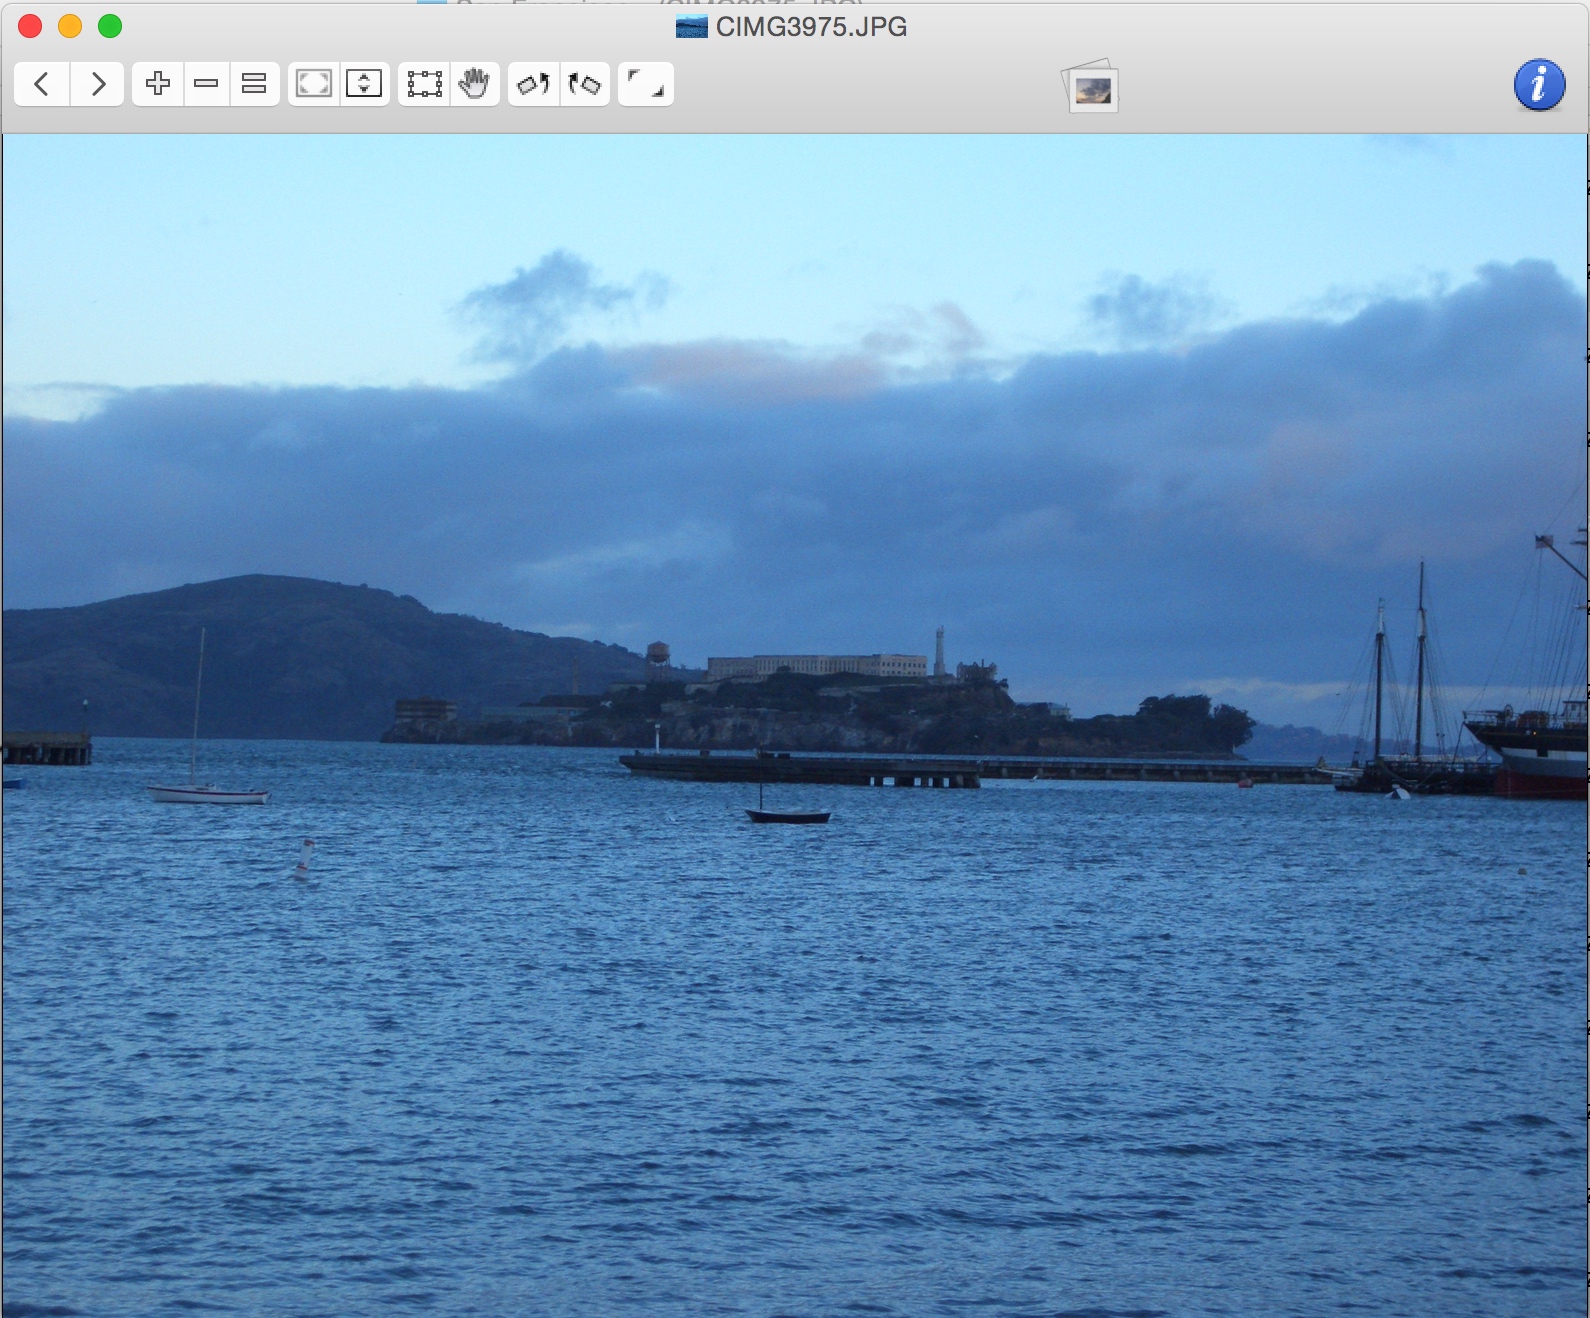
lyn_mac_osx_image_viewer

Finally… its fast and lightweight
I hate slow applications and this one is very fast and lightweight and doesn’t hog the cpu.

So, if you are looking for a image viewer for Mac OSX then I can highly recommend Lyn Image Browser.
How give a user permission to run a specfic command as root Ubuntu

Sometimes it can be really useful to give a user privileges to run a specific command as root. For example – if you wanted to allow a user to restart a specific service or run a specific program as root without given them access to the whole server. You can configure this using visudo command as root. Note: you really must be root when you do this and not a sudo.

 sudo su -

Then..

visudo

You can then modify the configuration file. There are specific sections in the config file which are show below. For example – I want to give a user called debug permission to run supervisorctl as root.

....

# User alias specification
debug ALL=(ALL) NOPASSWD:/usr/bin/supervisorctl

Hope this is helpful.

paramiko.SSHException: Incompatible ssh peer (no acceptable kex algorithm) ubuntu 14.04

I was trying to sftp some files using Python Paramiko on Ubuntu 14.04 and got the following error: “paramiko.SSHException: Incompatible ssh peer (no acceptable kex algorithm)”. It turns out that there is an incompatibility issue with OpenSSH 6.7 and Paramiko with a version less than 1.15.1. At the time of writing (November 2014) Ubuntu 14.04 came with 1.10.1.

To fix the issue, you need to upgrade Paramiko to at least 1.15.1. You can do this by using PIP which is a Python package management system. Here is how to you do this:

apt-get install python-pip

Do a quick version check of the Python libs like so:

pip freeze

Which gives the following output:

landscape-Client==14.01
PAM==0.4.2
Twisted-Core==13.2.0
Twisted-Names==13.2.0
Twisted-Web==13.2.0
apt-xapian-index==0.45
argparse==1.2.1
chardet==2.0.1
colorama==0.2.5
configobj==4.7.2
html5lib==0.999
mercurial==2.8.2
paramiko==1.10.1
pyOpenSSL==0.13
pycrypto==2.6.1
pycurl==7.19.3
pyinotify==0.9.4
pyserial==2.6
python-apt==0.9.3.5
python-debian==0.1.21-nmu2ubuntu2
requests==2.2.1
six==1.5.2
ssh-import-id==3.21
urllib3==1.7.1
wsgiref==0.1.2
zope.interface==4.0.5

Then upgrade Paramiko using PIP.

pip install paramiko --upgrade

Voila. Paramiko sftp should now work.

In my case, I actually use Ansible to deploy changes across multiple servers. Ansible comes with a PIP module. You can automatically upgrade Paramiko across all servers like so:

## Python Packages Using PIP 
## We are doing this because we require the latest version of paramiko
- pip: name=paramiko state=latest

How to allow incoming pings through Synology Firewall

I have a few Synology NAS at work which are used for storage. I have been locking down the firewall on them to only allow certain ports from specific IP subnets. However, I still wanted to be able to ping the Synology from anywhere. I couldn’t work out how to configure the Synology firewall to let through pings ( ICMP messages).

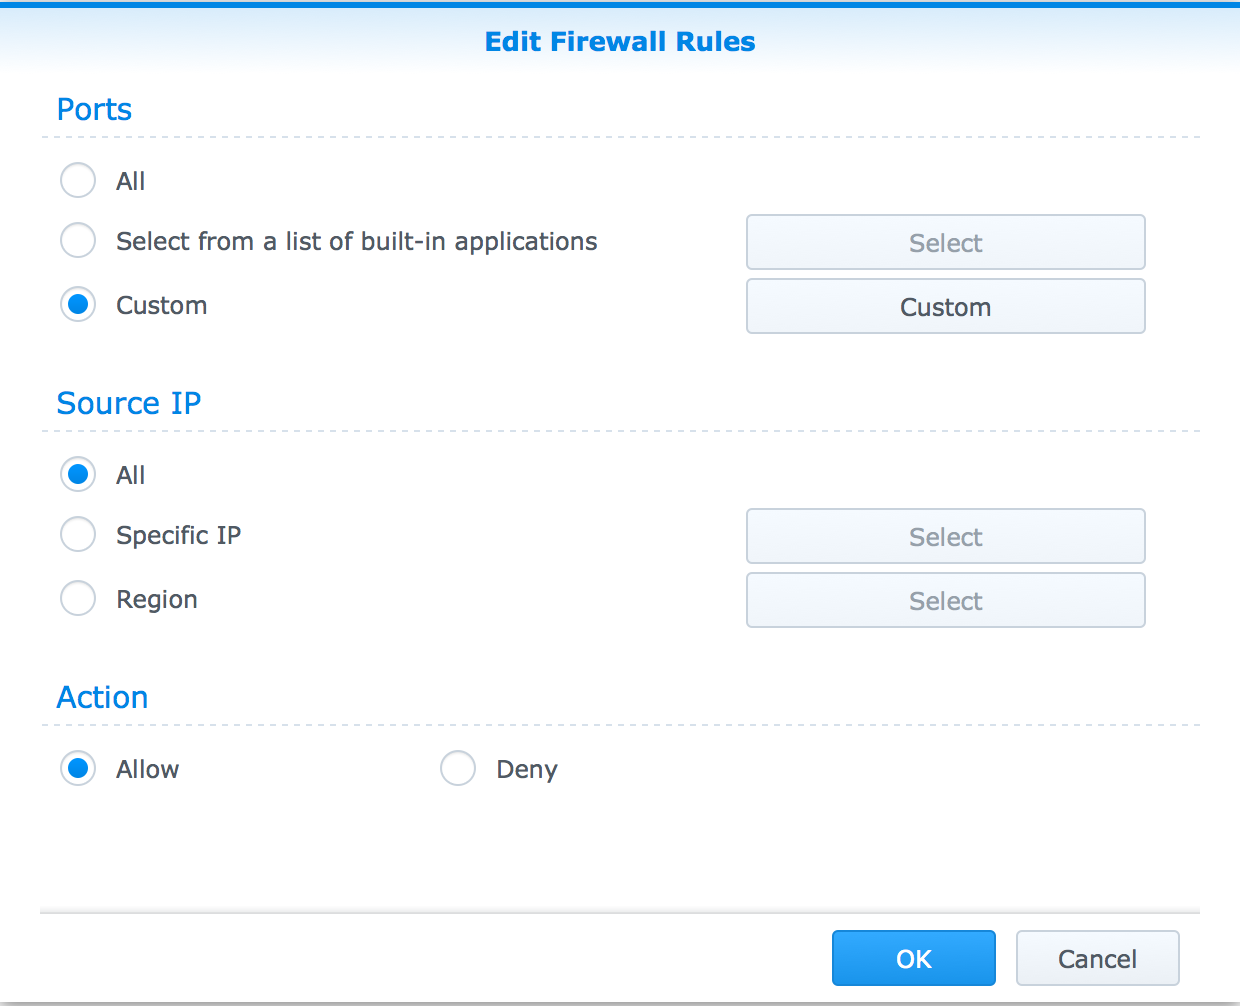
You have to go to: Control Panel -> Security -> Firewall -> Create:

allow_ping_messages_from_synology_nas

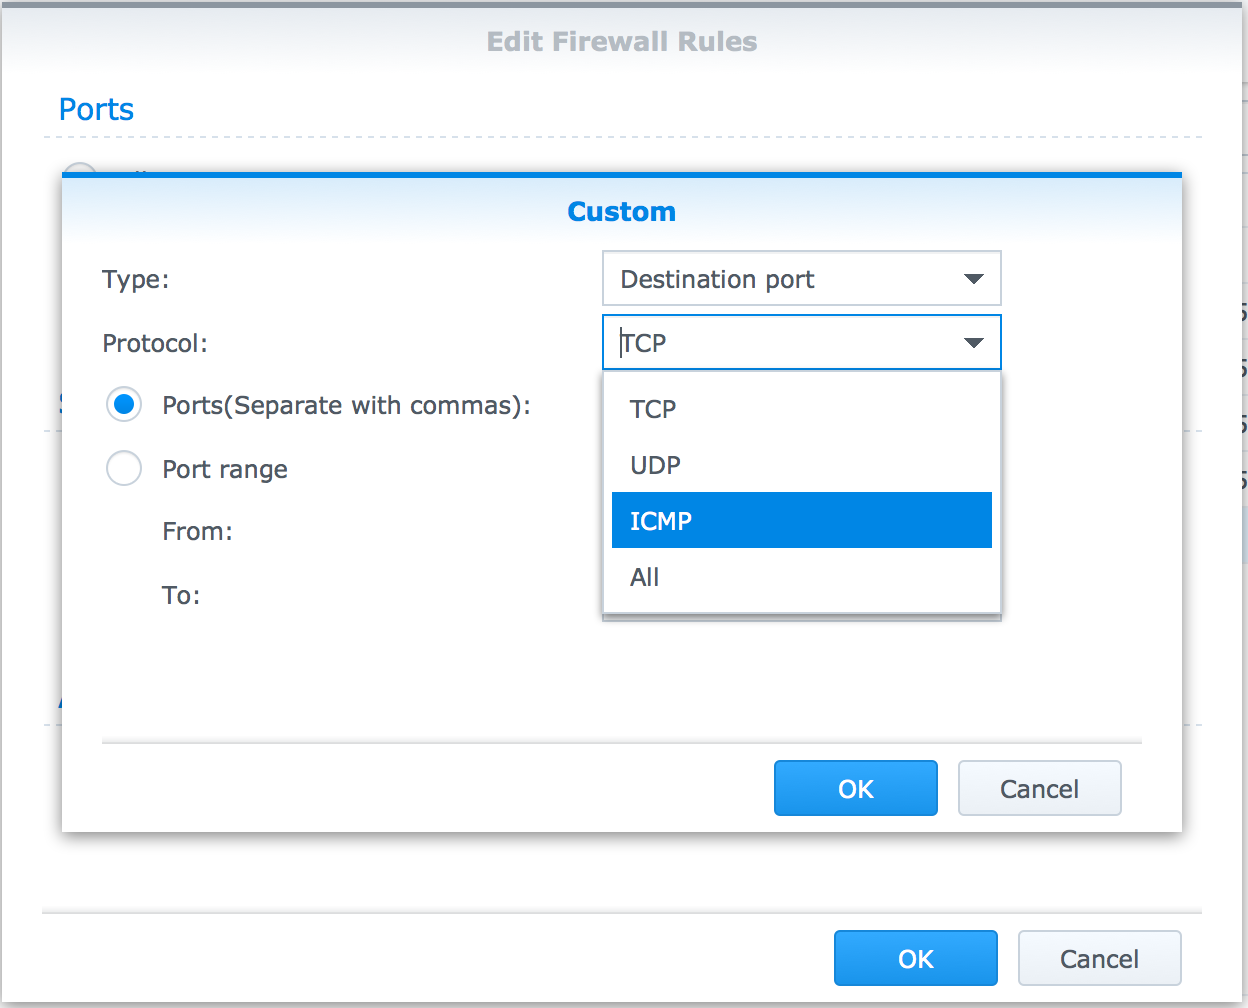
Under ports select Custom and then under protocol select ICMP.

allow_icmp_messages_from_synology_nas

Press OK a few time and then Save the firewall settings. You should then be able to ping the NAS without any problems.

How to monitor bandwidth on Ubuntu Server

I wanted to monitor the bandwidth usage on my Ubuntu server without a full blown graphic monitoring system but something that I could just check once in a while just to see how things are running. I found an really simple tool called vnstat. It’s good because it’s simple, fast and easy to use and that doesn’t require a PhD in networking to get going. It also nicely presents the data with good summaries.

Here is how I setup network traffic monitoring using vmstat:

1 – Install vnstat – note there is another program called vmstat – so be careful what you type.

sudo apt-get install vnstat

2 – Configure the network adapter to monitor. Vnstat automatically configures the network adapters however it’s worth checking that they are correct and having a quick peek through the configuration file.

sudo nano /etc/vnstat.conf

If you do have made any change then don’t forget to restart the service.

sudo service vnstat restart

3 – Get you first report – You will have to wait a few minutes to get your first report. This how a typical report looks like:

#vnstat

outputs:


Database updated: Sun Nov  9 20:11:55 2014

   eth0 since 07/22/14

          rx:  4.56 GiB      tx:  109.97 GiB      total:  114.53 GiB

   monthly
                     rx      |     tx      |    total    |   avg. rate
     ------------------------+-------------+-------------+---------------
       Oct '14      1.24 GiB |   38.39 GiB |   39.63 GiB |  124.13 kbit/s
       Nov '14    361.70 MiB |    9.56 GiB |    9.91 GiB |  108.84 kbit/s
     ------------------------+-------------+-------------+---------------
     estimated      1.20 GiB |   32.43 GiB |   33.62 GiB |

   daily
                     rx      |     tx      |    total    |   avg. rate
     ------------------------+-------------+-------------+---------------
     yesterday     37.62 MiB |  805.67 MiB |  843.29 MiB |   79.96 kbit/s
         today     29.32 MiB |  176.40 MiB |  205.73 MiB |   23.18 kbit/s
     ------------------------+-------------+-------------+---------------
     estimated        34 MiB |     209 MiB |     243 MiB |

Hope this is useful to someone. Let’s me know if you have any improvements to this post or can recommend other tools that readers of this blog might be interested in.

How to stop .ds_store files being created in Apple OSX

I use source control while developing software. Apple’s OSX creates .DS_Stores files in any folder that you browse with Finder. These are normally hidden but they obviously aren’t ignored by version control which is designed track everything including hidden files. I could add them to the .ignore files in both Mercurial or Git – but this is time consuming and annoying.

Therefore, I installed asepsis which an lightweight opensource tool. This forces Mac to store all the .DS_store files in another location. It was quite straight forward to get going.

1. Download the software
2. Install it
3. Restart the computer
4. Migrate all the existing DS_store files using the command:

asepsisctl migratein 

Hope this is helpful.

Firefox Spell Checker Doesn’t Work In Apple Mac OSX – How to fix…

I’ve moved from Ubuntu to Apple Mac OSX and like to use Firefox.  However, rather annoyingly the Firefox spell checker doesn’t appear to work on Apple by default.  Bizarrely, it doesn’t highlight any incorrect spellings.  I found that the only way to fix it was to add another dictionary to Firefox.  Here is how I did it.

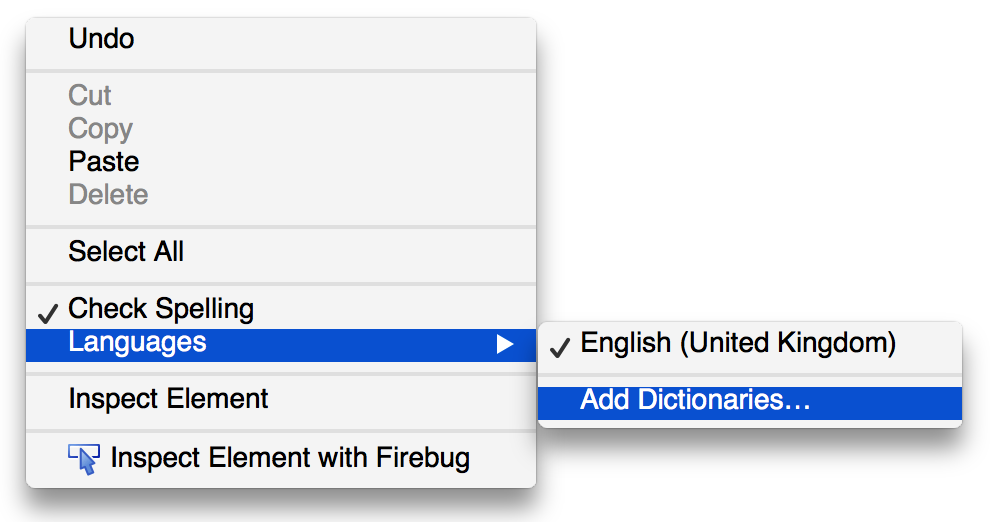
Step 1 – Find a dialogue box or text box and right click.  You should see a menu like so.  You could click Language -> Add Dictionaries

how_to_make_firefox_spell_check_work_osx

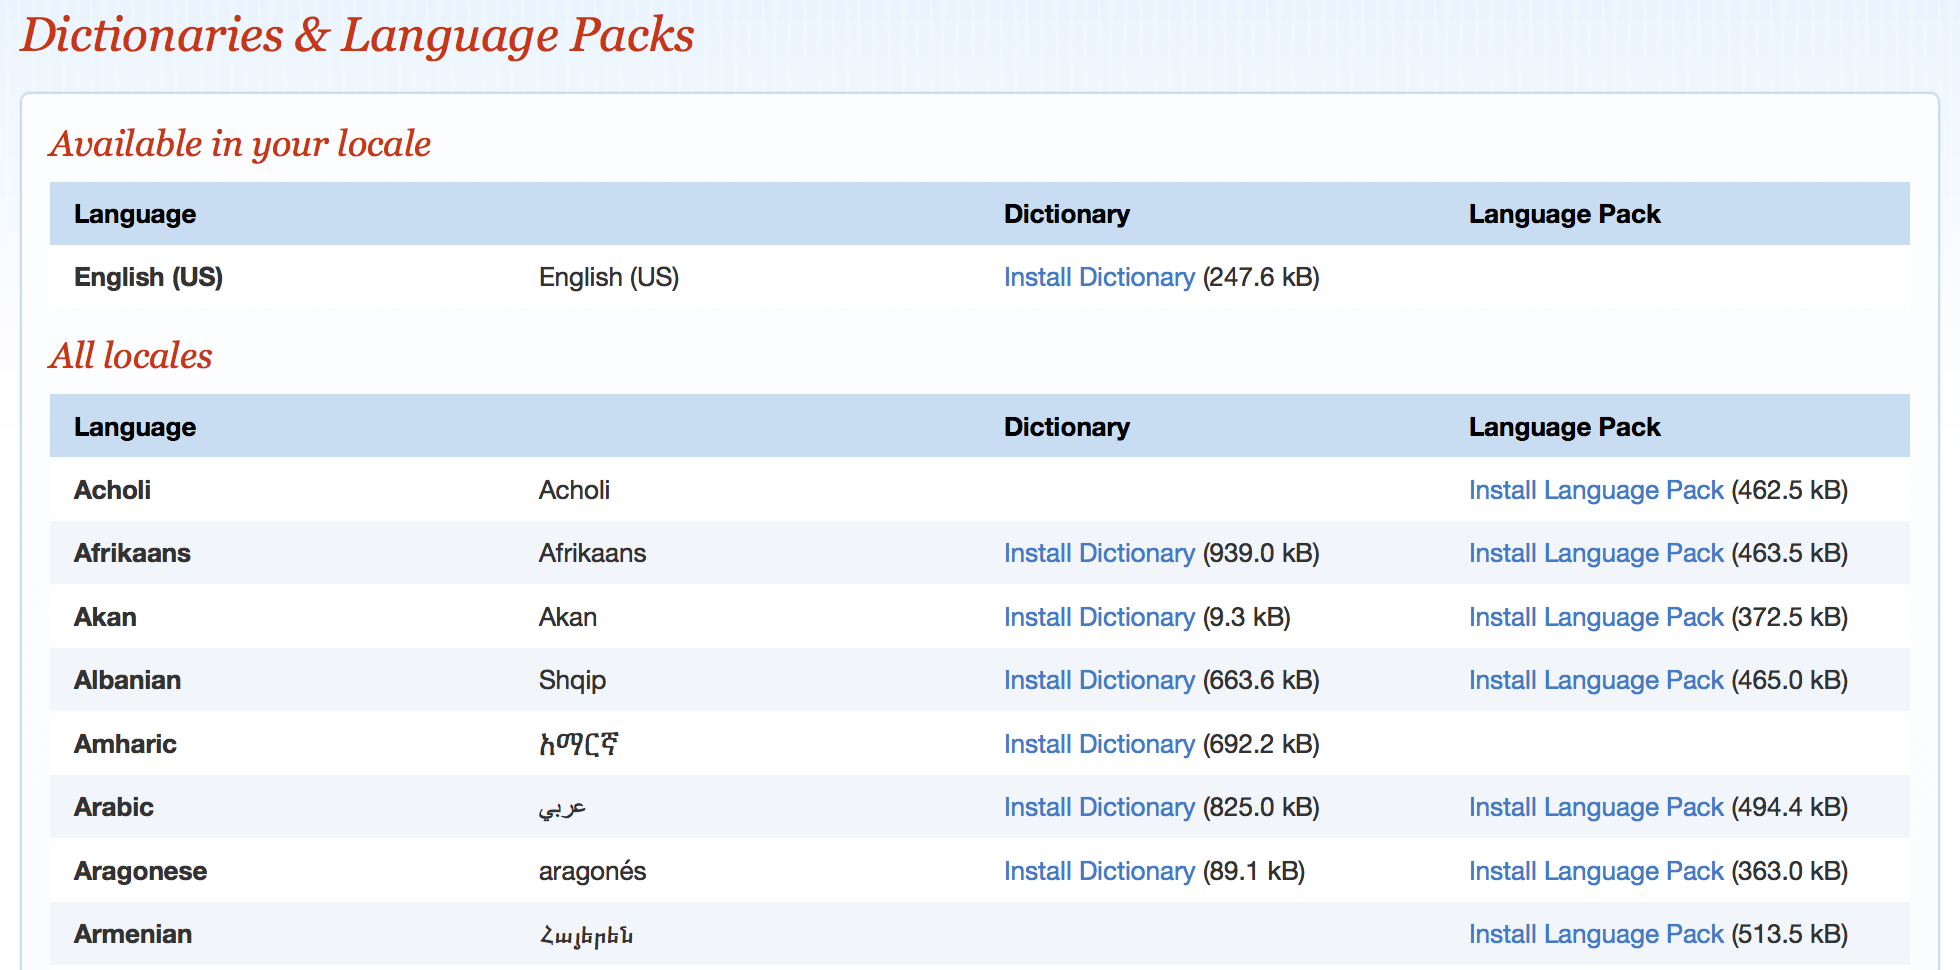
Step 2 – You will be taken to the Firefox Dictionary and Language Pack Page .  You should select and install the right dictionary for your locale.

firefox_spell_check_broken_apple_mac_osx

Step 3 – I installed English (United Kingdom) dictionary and immediately the spell checker  immediately started working.  Hope this helps someone else.

p.s. if anyone from the Firefox team are reading this – why doesn’t Firefox work with native Apple spell check / dictionary?