I just tried to use the Ansible htpasswd and it said:
msg: This module requires the passlib Python library
You just need to check that python-passlib is installed like so:
action: apt pkg=python-passlib state=latest install_recommends=yes
I just tried to use the Ansible htpasswd and it said:
msg: This module requires the passlib Python library
You just need to check that python-passlib is installed like so:
action: apt pkg=python-passlib state=latest install_recommends=yes
On our Ubuntu 13.10 server, I had created an apache configuration file for a virtual host however, I could not enable it using a2ensite. The file was here:
/etc/apache2/sites-available/www.example.com
I tried to enable it:
a2ensite www.example.com
However, the command complained that ERROR: Site www.example.com does not exist! The files clearly exists. It turns out the this command only works if the file ends with .conf. So
mv www.example.com www.example.com.conf
a2ensite www.example.com.conf
Voila it now work. Why or why doesn’t the developer give useful error messages. For example they should have write. Error – the files doesn’t have a .conf on the end!
It’s a real pain to change the bitrate of Sound Juicer to actually make the MP3 or Ogg files good quality. For some reason the default quality is terrible and the developers have removed the menu which allows you to change the bitrate. Frankly, this makes Sound Juicer useless as a ripping tool and I believe that it should be removed from the Ubuntu repositories.
Basically, my advice is to uninstall Sound Juicer and install Asunder.
sudo apt-get remove sound-juicer
and
sudo apt-get install asunder
This will save you a world of pain and give you an easy to use piece of software.
I have been trying to make curl post request to a script like so:
    $ch = curl_init('http://my.server/api.php');
    curl_setopt($ch, CURLOPT_HTTPHEADER, array('Content-Type: application/json') );
    curl_setopt($ch, CURLOPT_POSTFIELDS, array('json' => 'hello' ));
    curl_setopt($ch, CURLOPT_POST, true);
    $response = curl_exec($ch);
It keep failing with an Apache 213 error like this:
The requested resource
/api.php
does not allow request data with POST requests, or the amount of data provided in the request exceeds the capacity limit.
It turns out that you need to set the curl options in the correct order and CURLOPT_POST needs to be before CURLOPT_POSTFIELDS. Like so:
    $ch = curl_init('http://my.server/api.php');
    curl_setopt($ch, CURLOPT_HTTPHEADER, array('Content-Type: application/json') );
    curl_setopt($ch, CURLOPT_POST,
    curl_setopt($ch, CURLOPT_POSTFIELDS, array('json' => 'hello' ));
true);
    $response = curl_exec($ch);
Do you get lots of annoying crash reports on Ubuntu?.. well Apport is system tool which intercepts system crashes and reports them to Ubuntu. I’m sure that it is great for the developers – however it can be really annoying if you get the same error appearing all the time. So, you can easily disable Apport Error Reporting on Ubuntu by:
Step 1 – Stop Apport Service
sudo service apport stop
Step 2 – Remove apport
sudo apt-get remove apport
Job done!
We just had a problem with our DHCP server and there seems to be another dhcp server on the network. To find this I used Wireshark on my Ubuntu machine to find the problem.
1 – Install wireshark
apt-get install wireshark
2 – Launch wireshark with permissions to read the network interfaces.
You can either do this by runnning Wireshark as root (which is really not recommended but a quick hack if you need to get the job done). Or you can give your user permission to read the interfaces which is much better in the longterm.
2.1 – To give your user permission to capture network interfaces do the following:
sudo dpkg-reconfigure wireshark-common
This will ask you the following question. Answer Yes.
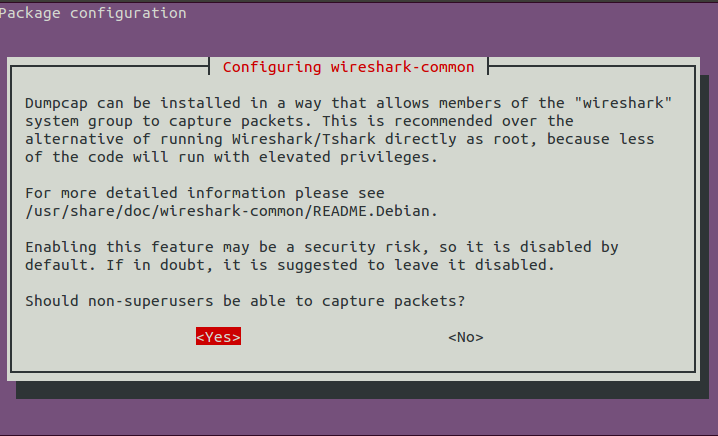
This creates a group called wireshark and anyone in this group can capture network data on the interface.
2.2 – Add you user the wireshark group.
sudo adduser $USER wireshark
2.3 – Logout and log back in
For you group permissions to change – you need to log out and then log in again. Alternatively, you can just restart your computer.
3 – Start Capturing With Wireshark
Launch Wireshark either from your launcher or using terminal “wireshark”. On the start screen you should see a list of interfaces on the left hand side. Select the interface you would like to capture data from and press the start button.
![The Wireshark Network Analyzer [Wireshark 1.10.2 (SVN Rev 51934 from -trunk-1.10)]_010](http://www.randomhacks.co.uk/wp-content/uploads/2013/12/The-Wireshark-Network-Analyzer-Wireshark-1.10.2-SVN-Rev-51934-from-trunk-1.10_010.png)
4 – Filtering For “bootp” messages
You can then filter Wireshark just to show dhcp messages by filtering for bootp message but typing “bootp” and clicking apply.
![Capturing from eth0 [Wireshark 1.10.2 (SVN Rev 51934 from -trunk-1.10)]_011](http://www.randomhacks.co.uk/wp-content/uploads/2013/12/Capturing-from-eth0-Wireshark-1.10.2-SVN-Rev-51934-from-trunk-1.10_011.png)
5 – Find all the offer packets
If you have multiple DHCP servers – you will have multiple offer packets. You can filter the messages by bringing up the packet details
click View -> Packet Details
This will show the packet details below the message list like so.
![Capturing from eth0 [Wireshark 1.10.2 (SVN Rev 51934 from -trunk-1.10)]_012](http://www.randomhacks.co.uk/wp-content/uploads/2013/12/Capturing-from-eth0-Wireshark-1.10.2-SVN-Rev-51934-from-trunk-1.10_012.png)
You should then go into “Bootstrap Protocol” -> “Options: DHCP Message Type” and right click on “DHCP: Offer” and select “Apply As Filter”.
This will then filter all dhcp offers and you will be able to see what servers are responding on the system.
Great YouTube Video Tutorial
There is also a good wireshark dhcp tutorial on youtube which shows this in action. It is a Windows focused tutorial but explains the other general concepts really well.
I hope this helps someone. Let me know if you have any suggestions of how this tutorial can be improved.
If you need to remove all the old kernels which were not currently being used to free up some space on the boot partition then this will do it for you.
sudo apt-get remove --purge $(dpkg -l 'linux-*' | sed '/^ii/!d;/'"$(uname -r | sed "s/\(.*\)-\([^0-9]\+\)/\1/")"'/d;s/^[^ ]* [^ ]* \([^ ]*\).*/\1/;/[0-9]/!d')
Synology have released a Linux Cloud Station Client – which is brilliant news. Well done Synology for listening to your customers. It works really well and is quite easy to installed.
Step 1 – Download the Cloud Station Client for Linux from here. Note – there is a section for Linux so don’t download the Windows client.
http://www.synology.com/en-uk/support/download
Step 2 – Extract the download
tar -xvzf CloudStation-Linux-Installer-2572-64bit.tgz
Step 3 – Run the ./install file . Important – don’t run it as root! If you run the install script as root no menu icon will appears and the client will not run.
./install
The rest is quite simple – just follow the instructions that appear on the screen.
p.s. If you ever want to uninstall Cloud Station – here are quick guide.
I really love watching 4oD but I get an error message when playing it on my Ubuntu 14.04 laptop. It is actually really easy to get 4oD to work on Ubuntu – you just need to install HAL.
sudo add-apt-repository ppa:mjblenner/ppa-hal
sudo apt-get update && sudo apt-get install hal
It should work after that. Please let know if it doesn’t for you.
I wrote this article back in 2013. Since then I’ve owned two Volvos.
The bad news is that both Volvos that I’ve had this problem. All the problems I’ve had have been caused by the diesel particulate filter and EGR valve. Something goes wrong with the ERG value or a pipe get blocked and then soot builds up in the system. Then the whole thing clogs. You really need to get it fixed because otherwise your diesel particulate filter can block or worst case, you can block up the turbo charger.
The good news is that Volvo now admit they have a fault with these parts. You should take your car to a Volvo garage and most likely they will replace and fix the problem for you. The only problem with this plan is that Volvo will try to only fix the original fault and don’t want to take responsibility the damage caused by the fault. You need to push the garage very hard to take responsibility and not charge you.
========
Here is my original post:
I purchased a Volvo V50 estate (secondhand) just over a year ago. After a few months it started having problems when pulling away or when revving the engine over 3,000 RPM. This first started happening when it was really cold (-9’C)… however, after a while, the car would often go into reduced engine performance mode at any temperature if pushed hard. This was really dangerous because this would often happen when joining a busy road or when trying to get out of a tricky situation. The car would then stall or loose most of the power. I wish Volvo would allow me to override this setting on the car so that I could remain safe.
Having spoken to several mechanics and researched on the internet – the problem generally seems to be with the particulate filter. It can be either a faulty cable (next to the battery) or the tube to the particulate filter sensor becoming blocked.
In my case, it turns out to be the tube to the particulate filter sensor becoming blocked. It seems that the Volvo dealer who serviced the car previously had not checked or topped up the EOYLS tank. This meant that the EGR (Exhaust Gas Recirculation) Valve that a pipe to the particulate sense and valve had become clogged up
The moral of this post is:
1) If I had taken the car to a garage when this problem first appear then it’s very lightly that the EGR valve would not become clogged and needed replacing.
2) Volvo know that this is a problem and should provide a sensor to the EOYLS tank.
3) Volvo should allow the driver to override the “Reduced Engine Performance” stalling and shutting down of the car. It is simple dangerous.