I’m interested to see how well it works.
How to update wordpress without providing ftp access
You need to set the permissions on the wp-content so that your webserver can write:
chown -R www-data:www-data wp-content
chmod -R 755 wp-content
Then set the following configuration the your wp-config.php
define('FS_METHOD', 'direct');
Package ‘ia32-libs-gtk’ has no installation candidate Ubuntu 13.10
The package ‘ia32-libs-gtk’ has been removed in Ubuntu 13.10 (I have no idea why). When you try and install it you get the error “Package ‘ia32-libs-gtk’ has no installation candidate”. It seems that most people need this ia32-libs-gtk for installing or running Adobe Air. I have found the solution is:
sudo apt-get install libgtk2.0-0:i386 libnss3-1d:i386 libnspr4-0d:i386 lib32nss-mdns libxml2:i386 libxslt1.1:i386
This got Adobe Air working on my computer but it would be good to get feedback from other people – so please leave a comment if it works for you.
How to install Balsamiq Mockups on Ubuntu 13.10
I have made a new set of instructions for Installing Balsamiq Mockups on Ubuntu 13.10 because it it is slightly different from installing it on Ubuntu 13.04.
Step 1 – Download Adobe Air – http://airdownload.adobe.com/air/lin/download/latest/AdobeAIRInstaller.bin.
wget http://airdownload.adobe.com/air/lin/download/latest/AdobeAIRInstaller.bin
Step 2: Make the installer excutable.
chmod +x AdobeAIRInstaller.bin
Step 3: Try running the installer.
sudo ./AdobeAIRInstaller.bin
Step 4: If your computer is 64bit then you will get this error:
"error while loading shared libraries: libgtk-x11-2.0.so.0: cannot open shared object file: No such file or directory"
So, you will need to install the 32bit libs:
sudo apt-get install libgtk2.0-0:i386 libnss3-1d:i386 libnspr4-0d:i386 lib32nss-mdns libxml2:i386 libxslt1.1:i386
Step 5: Try running the installer again
sudo ./AdobeAIRInstaller.bin
Step 6: You might get this error:
Sorry, an error has occurred. Adobe AIR could not be installed. Install either Gnome Keyring or KDE KWallet before installing Adobe AIR.
To fix this run the following command:
locate libgnome-keyring.so
I got (but you might get something different).
/usr/lib/x86_64-linux-gnu/libgnome-keyring.so.0
/usr/lib/x86_64-linux-gnu/libgnome-keyring.so.0.2.0
You will need to pass reference to these libs when running the installer.
sudo LD_LIBRARY_PATH=/usr/lib/x86_64-linux-gnu ./AdobeAIRInstaller.bin
If this works for you then goto Step 7. If this doesn’t work then you could make symbolic links to the libs. For 64bit:
sudo ln -s /usr/lib/x86_64-linux-gnu/libgnome-keyring.so.0 /usr/lib/libgnome-keyring.so.0
sudo ln -s /usr/lib/x86_64-linux-gnu/libgnome-keyring.so.0.2.0 /usr/lib/libgnome-keyring.so.0.2.0
For 32 bit:
sudo ln -s /usr/lib/i386-linux-gnu/libgnome-keyring.so.0 /usr/lib/libgnome-keyring.so.0
sudo ln -s /usr/lib/i386-linux-gnu/libgnome-keyring.so.0.2.0 /usr/lib/libgnome-keyring.so.0.2.0
Finally – try running the installer again.
sudo ./AdobeAIRInstaller.bin
Then remove the symbolic links:
sudo rm /usr/lib/libgnome-keyring.so.0
sudo rm /usr/lib/libgnome-keyring.so.0.2.0
Step 7 – Download Balsamiq
wget http://builds.balsamiq.com/b/mockups-desktop/MockupsForDesktop64bit.deb
Step 8 – Install Balasmiq
sudo dpkg -i MockupsForDesktop64bit.deb
Step 9 – Make a cup of tea and some mockups
Kernel does not support a non-PAE CPU install KVM guest on Ubuntu 13.10 – Fix
I just started to install an Ubuntu 13.10 KVM guest – however the build process failed. The command that I was using was:
vmbuilder kvm ubuntu -v --suite=saucy --libvirt=qemu:///system --arch=amd64 --cpus=1 --mem=2048 --swapsize=2048 --rootsize=220040 --flavour=virtual --hostname=mydomain --ip=1.2.3.4 --mask=1.2.3.4 --net=1.2.3.4 --bcast=1.2.3.4 --gw=1.2.3.4 --dns='8.8.8.8 8.8.4.4' --bridge=br0 --mirror=http://archive.ubuntu.com/ubuntu --components='main,universe' --addpkg=openssh-server --addpkg=acpid --addpkg=acpi-support --user=myuser --pass=mypassword --dest=/mnt/kvm/server/
However, I got this error message:
....
This kernel does not support a non-PAE CPU.
dpkg: error processing /var/cache/apt/archives/linux-image-3.8.0-32-generic_3.8.0-32.47_amd64.deb (--unpack):
 subprocess new pre-installation script returned error exit status 1
Examining /etc/kernel/postrm.d .
run-parts: executing /etc/kernel/postrm.d/initramfs-tools 3.8.0-32-generic /boot/vmlinuz-3.8.0-32-generic
run-parts: executing /etc/kernel/postrm.d/zz-update-grub 3.8.0-32-generic /boot/vmlinuz-3.8.0-32-generic
Errors were encountered while processing:
 /var/cache/apt/archives/linux-image-3.8.0-32-generic_3.8.0-32.47_amd64.deb
E: Sub-process /usr/bin/dpkg returned an error code (1)
Basically, you just need ensure the the linux-image-generic package (i.e. a kernel which supports non-PAE CPU’s) is installed by setting the addpkg flag like so:
--addpkg=linux-image-generic
I hope this helps someone.
How to upgrade to Ubuntu 13.10 from the command line
sudo apt-get install update-manager-core
sudo do-release-upgrade -d
How to send Apache error.log to debugchannel
DebugChannel.com is a great new service / downloadable server to help debug your web application. The key things are that it speeds up debugging because all your debug output can be clearly formatted and shown in the same place. So you can get debug information from php scripts or even apache error logs. This post shows you how to send your Apache error logs or even Apache access lots to a debugchannel server.
Step 1 – Download the debugchannel tail client called dctail. This small python script is a wrapper for the the Linux tail command to watch files and send them up a debugchannel server.
wget https://github.com/debugchannel/debugchannel-tail-client/archive/master.zip
Step 2 – Extract the download and run the installer script which will install the command in /usr/bin/local/dctail and also create a service script in /etc/init.d/. This allows you to run dctail as a service on Ubuntu.
unzip master.zip
You need to run the installer script as root.
sudo ./install.sh
Step 3 – Setup the configuration files. The installer script creates a configuration files in /etc/debugchannel/dctail.conf . This is a json files. The key things to specify are the debugchannel server and which files you want to watch. To watch an Apache error.log you might need want a configuration file like this:
{
    "address": "https://debugchannel.com",
    "apiKey": "someApiKey",
    "files": { "/var/log/apache/error.log":"apachelogs" }
}
Note: we are sending the /var/log/apache/error.log -> https://debugchannel.com/apachelogs
Step 4 – Start running dctail as root (because it need permissions to read the Apache error.logs. You can either run it once using:
sudo dctail
Or (in Ubuntu) as a service
sudo service dctail start
I hope this helps someone.
How to allow nginx to reverse proxy socket.io connections
We have just been setting up nginx as a reverse proxy for a node server. Everything worked fine except the socket.io connections weren’t making it through.
You make a reverse proxy with:
location / {
    proxy_pass http://localhost:1025/;
}
However to make nginx (version 1.3.13 +) reverse proxy socket.io you should add change your configuration to:
location / {
    proxy_pass http://localhost:1025/;
    proxy_http_version 1.1;
    proxy_set_header Upgrade $http_upgrade;
    proxy_set_header Connection "upgrade";
    proxy_set_header Host $host;
}
I learnt this from Chris Lea’s blog which is excellent. Also thank you Chris Lea for your excellent ppa’s.
How to change Ubuntu Unity window switcher back to old style…
I’m a fan of Ubuntu Unity, however like all desktops there a few little niggles. I wanted to change the behavior of the Ubuntu Unity application switcher. The problem is that I have multiple terminals open and I want to be able to switch between them. However the alt-tab behaviour only allows you to switch between complete difference application. I.e. going between a terminal and Firefox is fine but you can’t switch between two terminals. Anyhow, here is the recipe that I found worked to change the alt-tab behaviour of Ubuntu.
1 – Install Compiz Config Settings Manager and the compiz-plugins-extra (which includes the old application switcher).
sudo apt-get install compizconfig-settings-manager compiz-plugins-extra
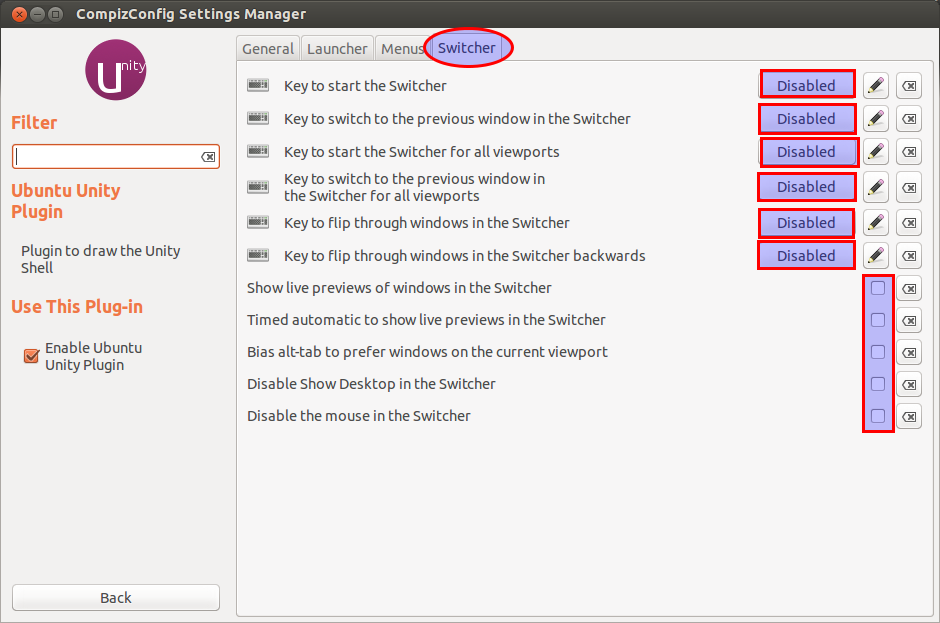
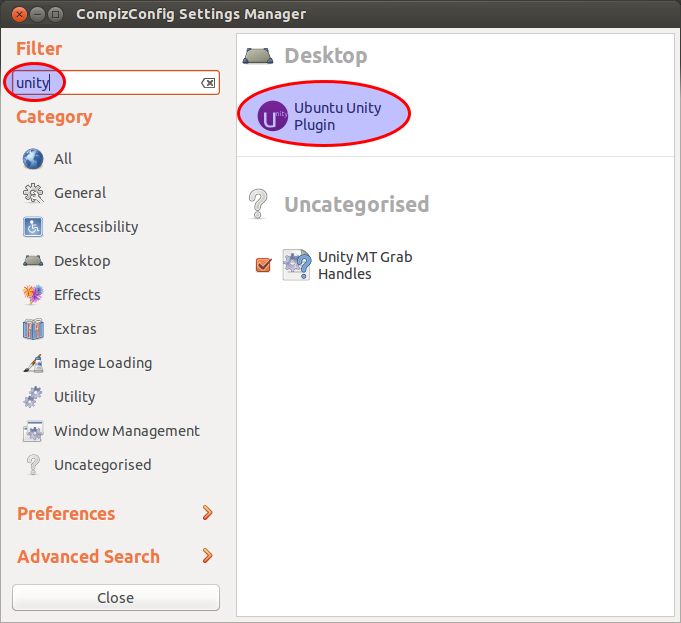
2 – Start Compiz Config Settings Manager and disable the Ubuntu Unity Switcher like so:
You can search for the Ubuntu Unity plugin in the top left hand corner.
Select the switcher tab and this disable everything. If you don’t disable all the features then you can have a key binding conflict.
3 – Enable the old Compiz Switcher like so:
Search for the application switcher in the top left hand corner.
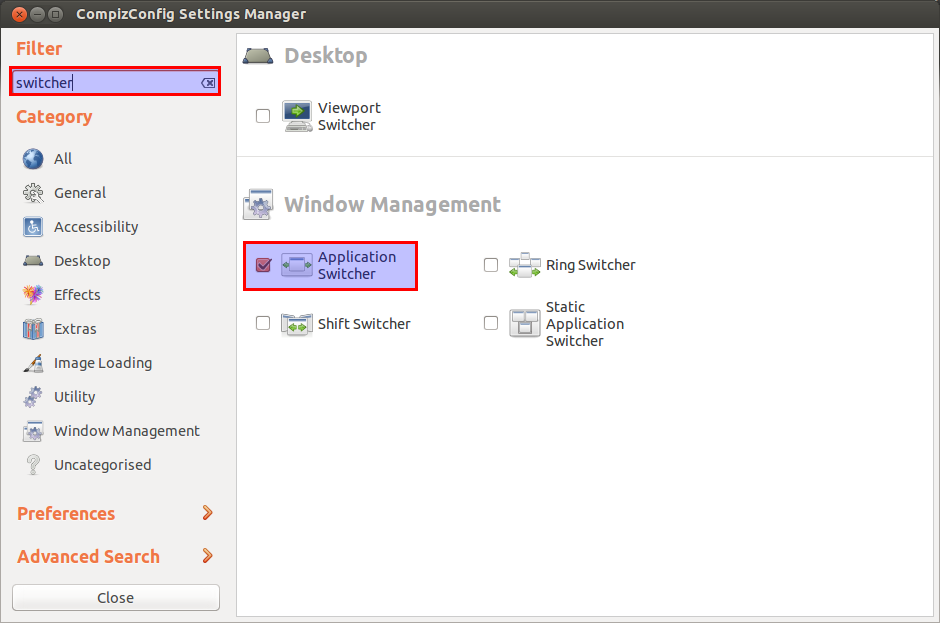
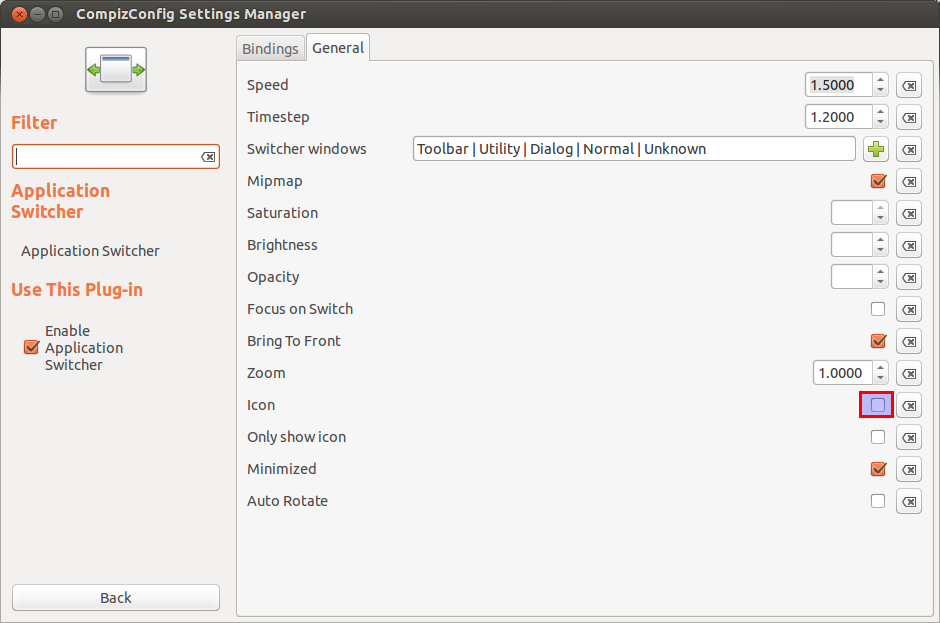
Uncheck the “icon” select box because otherwise you end up with a rather ugly icons which are massive.
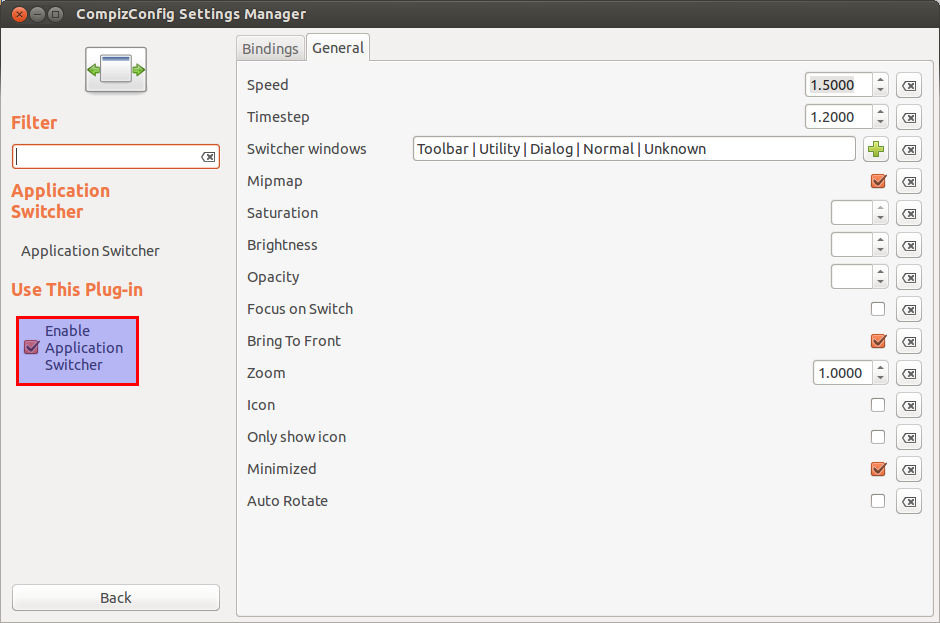
Finally Enable the Applcation Switcher.
You should now have a happy switcher. Hurray! Let me know if you have any improvements to this recipe.
How to setup Python Twitter Tools
I’m just playing around with Python Twitter Tools but given that I am new to Python, I can’t work out to set it up.
Step 1: Download and unzip the files from: https://github.com/sixohsix/twitter
Step 3: Install python-pip on your computer which is a tool for installiing Python software:
apt-get install python-pip
Step 4: Browse the folder and run:
apt-get install twitter
Step 5: Then you are can just run
The software will then authenticate with Twitter. You just have to login and get the pin number for the application.
Enjoy.
